Friday, 8 May 2015

Craft for the Craic - Wings Challenge

Over at Craft for the Craic - the challenge this month is Wings


Seen as I'm such a huge fan of Butterflies and Fairies, my natural inclination would have been to pick either of these but i decided to set myself a bit of a challenge and steer away from the obvious. Heres what I created - it looks like a pretty average card but the surprise is on the inside

I have the cutest set of litte duck stamps and I thought rather than just stamp them onto the card - I'd delevop the idea a step further. The 'ducks' start off like the one on the front of the card - just wearing his feathers!!!! included in the stamp set are 'clothes' for the duck, so its easy to stamp them, colour them and layer them up as fits the occasion. 
So having prepared the individual parts, each one was cut and layered, glued and then to strengthen them, they were laminated. 


Then they were stuck to the pegs, tiny magnets were attached to them   
 
Easily creating fun, useful fridge magnet note holders

So thats my take on our 'wings' challenge  and not a fairy or butterfly in sight :)
Thank you for taking the time to pop by and hope to see you back again soon


Friday, 17 April 2015

Craft for the Craic Challenge : Die-ing for Spring (use a die cut) or an Easter theme

This month at Craft for the Craic  the challenge is 'Die-ing for Spring (use a die cut) or an Easter theme. 
As I'm a huge fan of my die cut machine this was an easy choice and heres my creation.


You know those scraps of paper that we all keep, in the hope that 'someday' we will find a use for them . This is a great way of using them up. That said, I do know that the die cut machines are usually expensive, the dies also, I agonised for months before I finally parted with a large chunk of cash on the one suited me.  I love mine and find it very versatile If you are considering one, its worth doing a bit of research first.  

For the tree trunk - I diecut the 'peep-hole' out of piece of brown card and then I embossed it, to give the bark effect. The leaves I had fun with, I found an old travel brochure and thought the cover of it would be a suitable shade for the leaves.  Using a die a number of leaves were cut, I shaped them my by running them over a bone folder (that curls them slightl)  then to add a little more texture again using the bone folder I veins were added. I stamped the little badger twice, coloured him and then layered him up- so it looks like he is shyly peering out of the tree trunk.  

The fox again was created from a die and scraps of varying shades of brown card. Although some his parts are tiny and fiddley - they are worth the effort. I did cheat by drawing his eyes. The flower was cut, I used water colour markers to add a bit of shading to the edge of the petals. Using foam pads, he was layered up.


 Before sticking it all down - I arranged the individual parts on the card, Once happy with the layout, I removed the bits, Coloured the background with pan pastels, then using glue and foam pads- it was all stuck in place

Hope you like the finished article, as always thanks for dropping by. Please do go and vist the 
Craft for the Craic blog to see what the other team members have created

Friday, 20 March 2015

Craft for the Craic - March Challenge - theme is Bingo

Hello  :) - Its been a while since I blogged but a huge thank you to my very understanding DT over at

This month theres a challenge that was new to me, a Bingo Challenge, Here's the image\template we worked from.


I picked the Flower, Ribbon and Diecut combination and here's what  I came up with
I used dark purple card as my base card, I layered it with an embossed pale mauve card. The embossed pattern looks like tree bark and I love it ( you'll be seeing that again in the future).
Using a smaller piece of the dark card, it was layered beneath the Flower patterned paper.
I then stamped and die cut the butterflies, layered them up, I only glued along the center of the butterflies to allow the wings stand up, I then finished them off using the pearls


The final touch was the addition of the ribbon, I made a bow seperately, glued it onto the flat ribbon and tied it altogether with a final pearl.


As always thank you for dropping by and please go visit the Craft for the Craic  blog to see what the rest of the design team created .

Sunday, 21 December 2014

Craft for the Craic - Favourite Christmas colour

Hello there :)
Its been a while since I last blogged - but I had so many things happening that my crafting time was very limited, suffice to say I was having fun and I might blog about it at a later stage but for now -  I'm back

Over at Craft for the Craic this months challenge is 'favourite Christmas colour' This year I settled mainly on a blue and white theme with a little bit of sparkle thrown in. I think its safe to post this now as the majority of the cards should have been delivered by now  
 I used a combination die-cuts, acetate, stamps, watercolour paper, colouring pencils, glitter pens and self adhesive glitter film. Once all the tools were assembled,  I divided up the tasks- die- cutiing and stamping one evening, Cutting out and colouring a 2nd evening and then assembling on the third evening. Here's the finished article
 I used a 'grass' diecut for the icicles - used both the intended cut and also the waste pieces, on some of the cards I used the glitter film, other i used just plain white card stock.
 For the large snowflake - I used a die-cut, cut it twice and creted 2 semi-circles that were joined using double sided tape. To finish it off I added a single snowflake and topped it with a gem. On some of the cards I coloured the tips of the flakes with a blue pan pastel.

The angel image - I loved this, Stamped on water colour paper, coloured using a combination of pencils, glitter-pens and I finished off the wings with the glitter film

The reallly sweet thing about this stamp was the fact that she had a front and back - twice the effort but an unexpected surprise for the receipient - so that made it the extar effort  worthwhile. Once all the bits have been prepared - they were glued onto the acetate and attached to dark blue card.

As always thank you for dropping by, I hope you like what you see.All that remains for me to do is to wish each of you  a very Happy Christmas and peaceful new year.
See you 2015
Pixie

Friday, 17 October 2014

Craft for the Craic - Something for a child

This months Challenge over at Craft for the Craic - was something suitable for a child. This is my take on the challenge. Simple enough but then....... 
 Pull the dogs tongue and

Peek-a-boo

This was made using rather stiff card - that was to allow for the movement of the ears when the the tongue has been pulled. Its not jus for Kids you know - there are some adults that have seen it that enjoyed it a bit too much :)  And in case you were concerned  - no puppies were hurt in the making of this card.
Hope it made you smile today and as always - thanks for dropping by

Thursday, 11 September 2014

Craft for Craic - Something with Circles

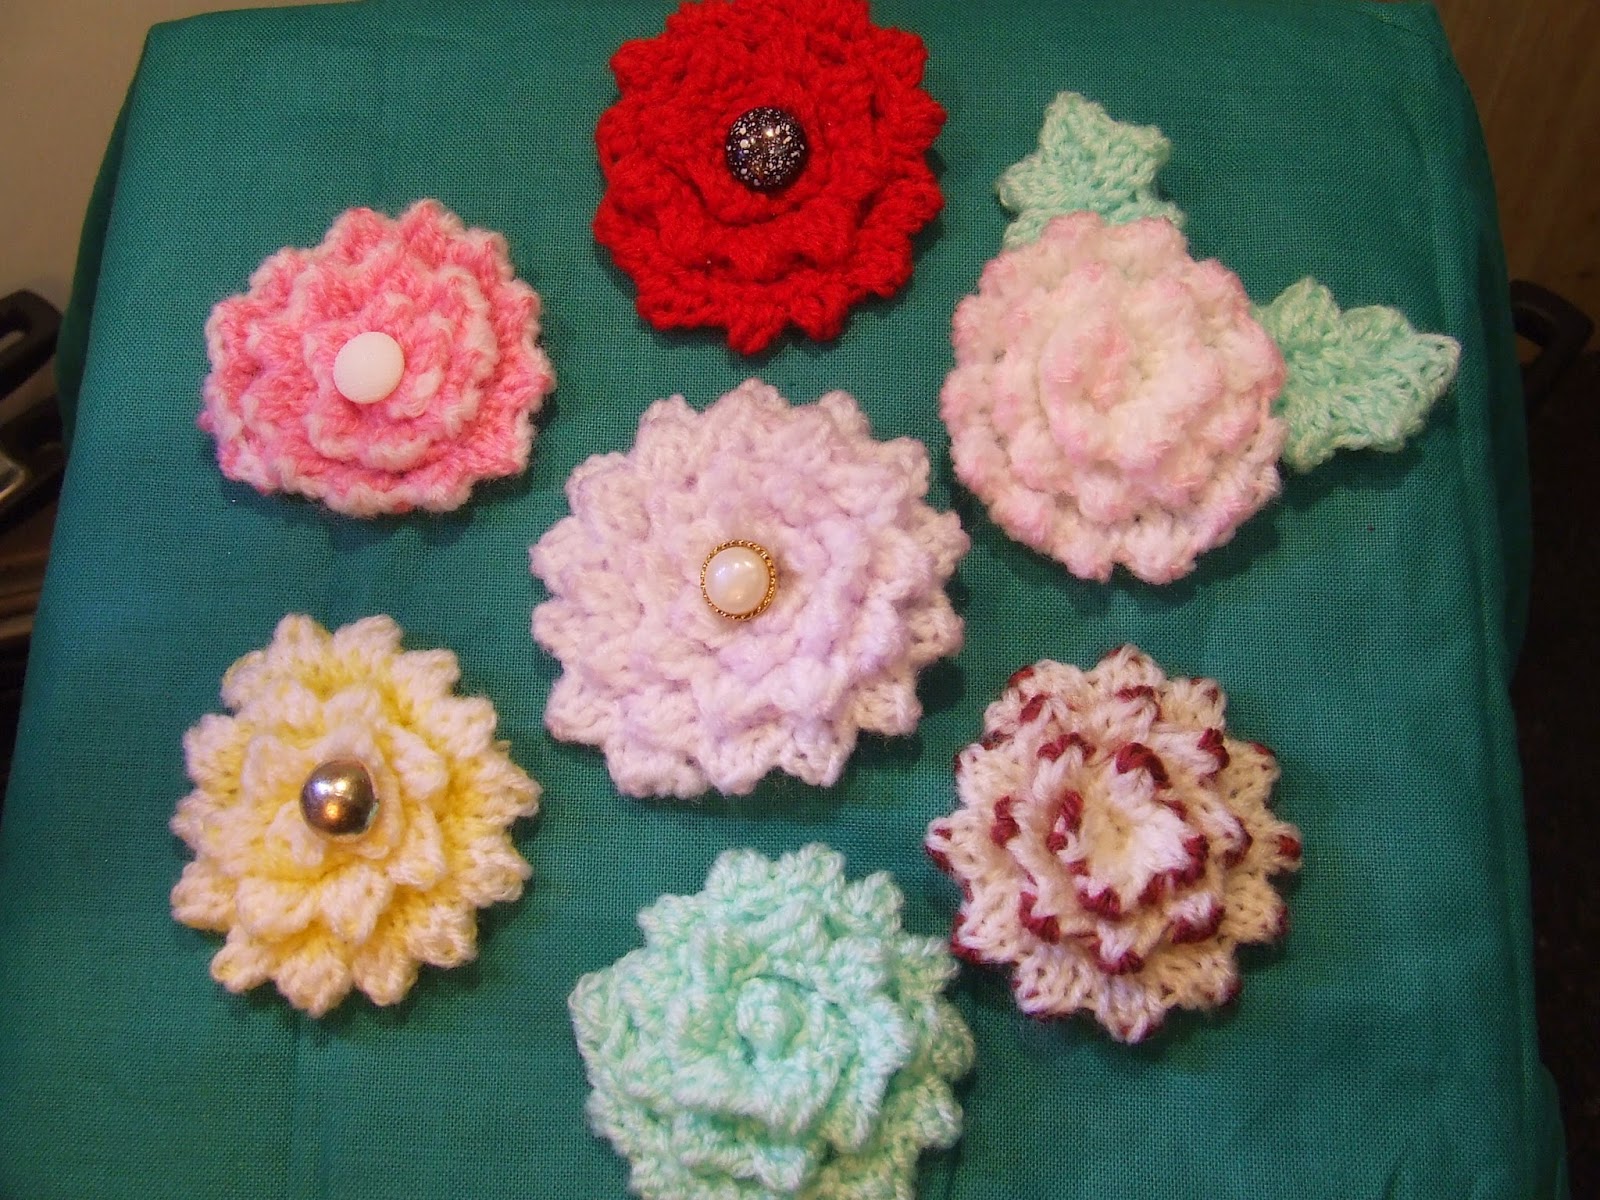
This months post was to include circles... So I decided I wouldn't use paper on this occasion and i'd involve other family members.. so Mammy Flutterby came up with the pattern for this

I started by casting on 40 stitches. Knit one row, Purl one row. On the next row- knit one stitch, wrap the wool around the needle and knit 2 stitches together (If you want different coloured points on your flower - this is the row to change colour on). Purl one row, Knit one more row and cast off. You end up with something like this  

Bend it over so the cast on and cast off rows are touching and sew them together

When the sides are sown together - a natural curve develops 

Use this curve to stitch it as shown below 

Thats the basic pattern.
Obviously by increasing the number of stitches and\or rows the flower size will also increase.

 In the picture below the same basic pattern was used to create the leaves- but when sewn together rather than follow the natural curve, the two ends were stitched together and sewn in a straight line to create the spine of the leaf.  
     Once the basic pattern is used - have fun add buttons in the centre,  put a pin in the back and use it as a broach or scarf holder,  Attach the to a hair band or bobbin or just put them on a chain or ribbon and hang them from a bag

I did say that the family were involved in this blog post. I can take absolutely no credit for the next part but I thought you might like to see them as they fit perfectly with the circle theme. This gorgeous selection of 'cakes and biscuits' came all the way from Australia - a huge thank you goes to 'Auntie Flutterby'

 
The pattern can be found on the following link

Thanks for dropping by .. Now anyone for a cuppa and a treat ?

Saturday, 6 September 2014

Fairies in Time DT- Fairy Party

This is my very first post for  Fairies in Time blog team and its been kindly sponsored by Dilly Beans


I used this gorgeous  image
Coloured her using watercolour pencils markers and promarkers.


I layered her up firstly on a piece of dark purple card and then a light green card. Using a piece of acetate I wrapped it round the front of the card. Using a bone folder I creased the edges so it would sit correctly  on the card. Its difficult to see in the above photo- so the one below may show it more clearly 

 
 Using some flowers from my stash, I shaped them and attached them to the acetate using some brads. I finally stuck the layered up image to a card amd finished off with some gems, leaves and flowers 

 
As always thank you for dropping by and please head over the Fairies in Time blog and see what the team have created